
The wasteland is a dressed-up desert sequence. It's an arrangement of rooms flood filled with yellow fakes. Thankfully it's not a maze, despite having several near-identical boards. Although without SolidHUD showing me the exits, there would likely have been some bumping into walls where the wasteland comes to an abrupt stop rather than connecting to a new screen.

The first real landmark is this oasis where some brigands are assaulting a poor woman. Upon spotting you rushing to aid her, they throw her aside and draw their daggers. You are to be their dinner. The wasteland is a harsh place.
The fight is nothing new. Shooting some ruffians a bit with the benefit of dressing up the encounter through the text. The Hensley specialty.
To reward Edgar, the woman provides some helpful information. Presumably sent out into the desert to die, the exiles of the wasteland have instead proved a very important point, forming their own society and finding ways to survive even in an area as hostile as this. While not even a life debt would get this woman to reveal the location of her people (lest the monarchy show up to ruin it, presumably), she does give Edgar a much needed lead about a village of dwarves on the surface. And where there are dwarves, there's dwarven steel.

While the player had free reign of where to go at the start of the game, it was clear whether or not you were following the intended path at any time. Here in the wasteland, you can stumble on things in any order. Here, a mysterious cave isn't yet ready for exploring.

In most directions, the board exits stop abruptly. On the eastern border, a river makes the end of game space more natural and clear. Without my board exit indicators I'd have been stuck running against every edge on every screen to find everything.

The river also helps by being a useful landmark to navigate by. It strongly suggests exits north and south on every board it appears on and makes sense in the game's world. Water is famously good to be near in the desert after all.
Hence this bit of farmland. Does anybody else feel guilty trampling crops in ZZT games by walking through forest like this?
The humble farmer explains that this place is known as Sandurval (a portmanteau of Sand + Survival?). The dwarves having been removed from Atherian society made the best of it and have formed a completely independent and thriving society of their own. Though Edgar may be an outsider, a human, and closely affiliated with the people that forced them from their previous home for "their beliefs" (unspecified) the dwarves here are pretty chill with him. The best revenge is living well, so as long as Edgar isn't going to cause any trouble, they don't mind him paying a visit.

Sandurval is a small town that's not all that different in appearance from the one at the start of the game.
The three buildings here are an incredibly convenient locksmith, the elder's home, and a brewery! This time the locksmith wants a truly exorbitant 1,000 gems, but unlike the one in the elven village, this guy won't be the source of the key to the tower.

The elder is the source for it. He can provide such a key if you're willing to do him a favor, of reclaiming an even more valuable key that has been stolen by some marauders in the cave seen previously. It's a little weird how key-obsessed everyone is in Gladiator.

As for the brewery, there's nobody inside, so Edgar is free to open all the cabinets and take a number of keys found within. Things get kind of awkward because of them. Some of the keys here are also going to appear in the marauders' cave making it easy to use a key from the brewery there, and have to worry about if you were supposed to or if there's another key in the cave of the same color that can replace it. The cabinets even have some duplicate keys, so you get that yucky feeling of not picking up a key in a ZZT game.
It definitely shook my confidence that the game was going to work out. I had a suspicion that soon I'd either be unable to proceed because I couldn't pick up a key that would be blocking a path or that I'd just accidentally skip over something using one of these random brewery keys.

Making things even worse is that there's a secret passage in the back of the brewery that leads to another room with a series of doors that each to lead to yet more keys! I'm still at a loss for what the brewery keys and this back room are meant for. I don't think it's even possible to reach all of the keys hidden here.

The marauders' cave sticks to what the tunnel to Mount Dragon did, only this time going all out with the switches. There are eight of them hidden around the cave, with several requiring players notice gaps in the solid walls that lead to paths made out of fakes.
All the keys needed to get through the board are found within the cave, just as before. Except it's possible to players to enter with all three keys in hand already. This might have been intended as a reward for exploring to be able to skip the cave, but a final door blocking the passage to the next room requires players hit a bunch of switches regardless. I don't think you can actually save any more time than the few extra steps to grab the keys at best, certainly nothing substantial

Upon first seeing this board, I did a double-take because it's the top of the pyramid in ADOM.
And just like in ADOM it's pretty much a pushover fight. Hensley doesn't know how to make a boss so the marauder leader simply becomes a ruffian after his spiel about killing you.
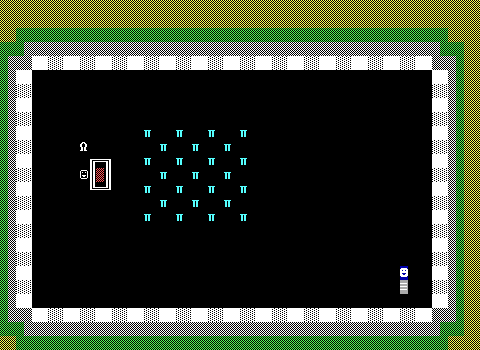
The tigers have default stats so you can shoot a lot of them before they make it out of their recessed cages. The most difficult thing about this board is finding the correct pillar that has a switch to open up the exit.

With the green key collected, you can then open the door in the Elder's home to collect the blue key which will allow entry to the tower. The final dungeon is almost upon us.

It's not a fun walk. You have to pretty much retread the entire game. One board for the elven village. Five screens of wasteland. One screen of wasteland entrance. Three forest. Three foot-of-mountain. Three tunnel. One board adjacent to the tower, and then the board containing the tower.
There will be no obstacles in your way except for the spinning guns in the tunnel. That's eighteen boards! I think that's a new record for dullest backtracking. It's made even more tedious as by this point I had forgotten the layouts of the tunnel boards and was now running into dead-ends in the darkness.

Eventually I arrived at tower Graylomman and stepped inside to the game's final dungeon. It looks like there are a number of buttons to press and paths to take, but this isn't the case. Nothing here can be interacted with save for a single button that blocks the exit as well as the path to the north. You have to hit the button and proceed into the passage instead.
It has been three hours now, since you
entered the Tower...at this very moment,
you are still kicking yourself for falling
into the trap that you did...you should
have suspected that that button would lead
you to a defeat, rotting in a dungeon,
rather than that it would somehow aid you
in your goal...you sit, stareing at a
roach crawling across the floor...when you
here something...you jail door is opening!
• • • • • • • • •
It turns out it was a trap, depositing Edgar directly into a basement prison cell. Up to this point, he's been pretty competent. This comes off as quite the misstep for him.
And now he gets to rot away down here forever, or he would were it not for an unexpected savior.

But wait! A savior!
Why it's none other than Elandra! Apparently she's been having some doubts about this whole "supporting the lord of darkness" thing and wants to atone for her wicked ways.
Her turn from dark to light certainly feels forced. She only showed up in one scene, and while there was some hint that she wasn't 100% committed to Darque's conquest, her backstory makes it strange that it's only now that she began to have doubts. I think this moment would have landed better with some justification for it. Maybe if she was actually under a spell and the power of Gladiator was able to break the curse, her changing loyalty would feel less spontaneous.
But even if her sudden pivot to being good feels unjustified, Elandra ends up being a really cool character. She's the only one who really gets to develop over the course of the game, and because of that she feels much more like a person than an archetype. She'll reappear again later, and earn her place as the coolest character in Gladiator by far.
Oh. Also she explains that Darque is performing the ritual to make the tower his as we speak. Better get moving, and watch out for worshipers of darkness!

Hensley then attempts something that doesn't work when you're too aware of how games are designed in general. The game's text states Edgar was stuck in his cell for several hours. Elandra stresses that time is of the essence. Hensley wants players to feel like they really are in a hurry.
They're not, and it's no surprise that the game doesn't feature some sort of actual time limit. Yet Hensley still tries to keep players antsy, setting up a series of keys and doors here as you'd get in tunnels and caves, though without any adversaries. It just slows the game now, which should be a detriment, yet I think it actually succeeds at putting players in the head-space of wanting to get moving.

Graylomman includes more action, and for once it's not in total darkness. The usual keys and switches are here once again, now accompanied by tigers (the worshipers of darkness Elandra warned Edgar about) which haven't actually been present anywhere previously.
They do a great job ensuring the final level of the game is the most threatening. Edgar has easily overcome all his adversaries thus far, and while he has plenty of ammo to fend off these tougher foes, his health is a bit more precarious. While you probably won't take a lot of damage here, you will inevitably misstep and be hurt. The tower has zero gems or other health sources, and there's no turning back to make use of the wishing well. Every bit of damage taken here brings you that much closer to death.

The ascent consists of just a single board, which is by far the most dangerous yet. Not only are there a lot of tigers, but there are also some fake walls, as well as invisible ones which make figuring out how to navigate the board quite the challenge.
Not as challenging as the fact that there's a passage error here. The entrance to this room doesn't have a matching passage and so the player winds up in this random spot in the inverted section of the screen where the walls are all fake and the empty spaces are all invisible. Thanks to the deliberately weird boundaries, I found myself running around trying to find a way to the red key, not realizing I actually entered the room on the other side of the door.

For fairness's sake, I noclipped my way inside to actually fight all the tigers, which was quite detrimental to my health.
The fake/invisible wall section is also unpleasant to get through. Though to its credit, I think it's a pretty cool trick inverting solid/floor like this. You wouldn't look at this board and think there was an invisible maze in it.

The final confrontation happens on the roof of the tower. This is where Hensley goes all out with the writing, taking a nice and simple looking board like this and elevating it into one of the most memorable scenes in a ZZT fantasy game I've seen since Deceiving Guidance.
However, writing is just one part of the scene. For actual player involvement, this is just one last big fight against some tigers. These demonic forces are definitely a threat when your health is low, though very much mitigated by how much ammo Edgar has on hand.

There is, of course, the threat that this is where Hensley figures out some more ZZT-OOP to make a true battle with Darque, and give the game a satisfying climax.

Alas no. Just as back with Elandra's pet snake, the battle is a bluff. Touching Darque at any time will trigger Edgar's victory over his foe, detailing a battle which the player does not get to participate in.
Darque is defeated, (ironically, the Gladiator sword is not involved), and curses Edgar and his descendants as his physical body is destroyed and his spirit returns to the dark world where he came from. The tower's ownership is once again in the hands of mankind, and the talisman recovered allowing the gate to the dark world to be sealed once again.
It's a happy ending for Edgar and the land of Atheria, for now at least.

As a little reward, players are invited to learn about two upcoming games. The sequel is one of them, with a plot overview that's so much more intriguing than most blurbs for ZZT sequels.

As well as this one, for Pandora's Box, a game which does not appear to have been completed unfortunately. I would have loved to see Hensley attempting what he describes in full as a "Techno-Thriller of epic proportions". If anybody could have pulled it off, it was this guy.