Today's Closer Look is one that I've been wanting to play for April for a few years, and would continually forget about. The Fool's Quest is a prank of a ZZT world. This specific world was created by John W. Wells and published on z2 under the guise of a "lost Alexis Janson game" (see this interview). This is the kind of thing that would have gotten it some attention, and the prank went a little further as the game received a Classic Game of the Month award. In practice though, the joke falls flat pretty quickly as its charade falls apart almost immediately.
The Fool's Quest isn't a once-lost ZZT world by Janson, nor is it an original adventure trying to deceive players into thinking it was made by Janson. This world simply took the existing Alexis Janson world of The Three Trials, changed the title screen, and added in some text in a few places to refer to the player as "the fool". Really, we're just playing The Three Trials.
As far as pranks go, one like this was mostly harmless. Janson remains one of the most important ZZTers, and her worlds are considered classics. The trick here wouldn't actually fool anybody familiar with the source material. For those who didn't have that familiarity, they were getting basically the same experience as playing The Three Trials, and really would only notice whenever they got around to playing the original.
The only real trouble here was that for some time the world was credited to Janson exclusively, a legacy artifact in z2's database and one that Museum itself had for some time as well.
But it's April so I'm finally going to play it. Janson's worlds are considered classics after all, and this is a good of an excuse as any to play one of her games.

One aspect of the game that I do appreciate, is that it breaks away from the standard vegetation heavy ZZT environments of forests and fields for a much bleaker looking winter palette. This will quickly reveal itself to be a major focus of the game's plot.
The game begins with the player approaching the king on his throne where their quest is presented to them.

That first sentence? New for The Fool's Quest. Everything else? Identical. Basically the world is falling apart due to evil shadows. It's your job (as fool) to figure out what can be done about it.


The only other objects of interest are are few empty spots for holding various items, and a bell that can be rung "for service".

The ringing of the bell summons the king's magician who seems to have been robbed blind. Recovering these stolen magical items is the first thing the player needs to do if they wish to make any real progress on their quest.

So if you've happened to play the 2nd Best of ZZT game. The parallels are pretty blatant. Compare this board with the Courtyard, and the throne room with Best's Throne Room (where a wizard has lost their orb and wand as well). As stated in the intro, this kind of recreation of successful worlds rings throughout Janson's earlier works. It's a bit unfair to those who worked on the originals, but keep in mind we're dealing with somebody who was still rather young when this game was made.
Of course, Janson isn't just re-skinning Royal Treasures, this courtyard is frozen solid thanks to the awful state the world is currently in.
The armory and treasury are locked, the former with a blue key, and the latter with an object. The towers down below are open, but there's no clear path to them. Talking to some of the guards lets the player learn that the armory requires permission from the king to enter, and the treasury is off limits to everyone.
Another guard on the bottom offers to open the gates for 30 gems presenting an early goal to work towards in order to open up the world a bit more.

I don't believe there are any hints on how to access the towers. The player just has to be willing to check for secret passages with the only real tell to them being that the courtyard is composed of normal walls letting the possibility of fakes blending in being a sensible theory to test.
The paths aren't strictly straight lines, requiring the player to twist around a bit to actually make it to the supplies.

One guard actually offers some useful-ish information. It's not much, but it does introduce some villains to be dealt with later.

To the east is the now frozen lake Hikcha. The object who tells the player this is named "suspicious man", but doesn't seem all that suspicious. He explains that nobody can go swimming anymore.
There's very clearly a path to the center of the lake, and that passage certainly isn't hidden, but this is just thin ice and still can't be traversed.
There's also this odd circle. Most boards have something like this. The player can't interact with it, and they exist just so Janson can easily track an object that will handle some things in the future on each of these boards.

Lastly, a strange stone wall stops the player from continuing on. This path is currently pointless.

With the wall to the east and the lack of money to open the gate to the south, the last option is to the west here where the S.S. Dread is waiting to sail along with a passage to a dark cavern.

That cave isn't just dark, but it also produces this message when you first enter it. This seems like it would be one of those warnings where you need an item to survive the harsh cold, but there's nothing of the sort. There aren't any torches here either so actually exploring it just yet is going to be a very... foolish idea.

Instead its time to get on the boat and enjoy more references to video games of the early 1990s.

There is no subtlety here. Captain Dread can be open asked about his Monkey Island 2 name origins and will openly admit to being from the game.

While I had the good fortune of having been in the middle of playing through The Secret of Monkey Island when I played Janson's Escape From Cannibal Island, I haven't touched the sequel and don't get any of these references.
The requirement of payment means that there is no way to make progress in this game without finding the secret path into the courtyard towers.

The man from Monkey Island is happy to take us to any zone in Sonic the Hedgehog 2 island after paying once. Travel is now free and the game opens up a little bit by giving the player the opportunity to complete each of the three islands in any order.
If you're thinking of this as The Three Trials, you might think each island is a trial, and well, that's not wrong, but each island is just a single board to conquer and not nearly the bulk of the game's content.

Our little island map has the boat occupying three places in reality simultaneously, but that's fine.
None of the islands are particularly well represented by their names either.

For Emerald Hill island, the first challenge is pretty standard Janson action board. That is, it has a pretty solid concept, here combining tigers with slimes to restrict movement, that turns up the difficulty knob a bit too far.

The tigers are extremely aggressive here, and the player really doesn't have any options to dealing with them. My health is too low to tank shots, my ammo is too low to try for some cover fire, and the slimes fill things up too fast for dodging to be an option.

It takes a lot of tries to get through this. To the point where I actually switched to a different island instead. I've seen this sort of thing in Cannibal Island before, where a lack of supplies to start the player off with leads to the most frustrating parts being front-loaded. If this game is anything like Cannibal Isle, I'd eventually hit more of a saturation point with ammo and be able to better deal with boards like these.

But for now, it was time to abandon the island with a cave and check out Mystic Cave island instead.
It did not occur to me that having half the keys from the previous island could potentially make the other islands unplayable, and in fact, looking at this map board now, I could use my cyan key to cheese the third island and enter from its exit that's locked by a cyan door. I'd be a fool to do so though, as the structure would prevent the objective from being completed in reverse.

Here everything is far more straight forward. It's another action board, but the numbers are more manageable. The ammo provided here is just 15 fewer shots than on Emerald Hill. For an open-ended selection of islands, the order you conquer them in can be pretty significant.
Here the player is safe to use the doorway as a choke-point and let the creatures come to them. Once the numbers thin out a little it can be safe to step inside and finish off the stragglers from a corner.

Once everything has been defeated (terribly, judging by my health remaining), the wand ceremoniously falls from the roof of the hut in what I am reasonably confident is intended to be an homage to the boss fights of Super Mario Bros. 3. With references to Monkey Island and Sonic the Hedgehog abound, I don't see why we can't have a little Mario as well.

It's pretty reasonable to assume the other two islands will have the mage's other stolen items, but I'm in horrible enough shape that I immediately went to turn in the wand in hopes of gaining access to the armory or treasury as a reward.

Alas, the reward is more powerful shots. A flag is set here, but it won't actually come into play until the game is practically over. It's a shame this is the easier action sequence as being able to wait until later in the game to obtain the wand could have been a useful strategy.

A return trip to the first island lets me finish the challenge and collect the stolen book by the skin of my teeth.
...with some cheating involved.
Don't get me wrong. I really like Janson's games, even these older ones. They're very creative, have memorable locations, some impressive music both original and conversions of video game tunes, and are still revered to this day for good reason. She just has this awful idea of early game balance.
In my playthrough of Cannibal Island, I suspected that the experience would likely vary wildly depending on the path the player takes, and I think that's even more extreme here. The Fool's Quest/The Three Trials can be a very punishing game where the challenge often goes a little too far. Expect the cheat prompt to be used many more times before this game is complete.

Returning the book offers some better rewards. Twenty gems means I can afford to open the castle gates, and being able to read the mage's book provides plenty of haphazard lore to examine.

There's a ton here, and it's almost all pointless fluff. I'll share the highlights, but for the full wiki, check out the object itself.

Torches is an interesting entry. City of ZZT does something similar where torches are considered rare items, and The Fool's Quest is much the same. It will be quite some time before the player gets any torches, and depending on the order the player explores the world potentially an even longer wait until they can be purchased at some rather high prices.

So this is the game's actual plot here. Essentially the player's goal is to pick up the seven Prosek gems and return them to the altar to be able to access the weather tower to fix the planet's climate problems and be able to acquire a magical goblet currently in a frozen lake in order to be able to separate the sun and moon from each other, etc etc.

What looks to be a reward is in fact just what you get from talking to the king a second time. This whole time I could've had significantly more ammo and gotten off to much more solid start.

Admittedly, this is entirely my own fault, but boy it would have been easy to avoid making the game that much harder for clueless players like myself if the king just gave the player the key when he gave them the quest to save the world.
From zero to almost 200 ammo just like that.

It's enough to make you want to pay 30 gems and leave. The other stolen artifacts can be recovered some other time I suppose.
South of the castle is another section directly from Best of ZZT Part I where there's also a canyon that the player falls into when they try to cross it the first time.

At least you get something kind of cool looking out of falling in. I don't know what it is with this game and ricochets. They're such a rarely used element even in worlds like this that rely heavily on shooting creatures. Like the thief's cave from before the challenge is to collect a full set of keys and make it to the exit.

A scroll by the entrance makes it clear that there is some nuance to it. The order counts as navigating the board also requires using transporters to zip around. Some changes the player makes in pushing boulders to get at other keys can cause the transporters to behave differently.
This scroll is a blessing and saves a lot of frustration that you'd otherwise have to deal with as you realize you grabbed a key too early.

You can observe the first instance of it here. After pushing the boulder out of the way to reach the key, the bottom transporter that was used to pick up the blue key would instead just dump the player back here.

The board itself is actually quite challenging to navigate. It's very easy to misread transporters at long distances or figure out where you actually need to go to start walking along some of the longer paths in the center of the board. The various conveyors scattered around also funnel the player in one direction making it possible to make a wrong turn and have to run another lap.
Note the bullet I have ricocheting endlessly in a horizontal direction. When the bullet is on the leftmost tile the transporters in that column become fully two way. This isn't actually mandatory, but did save plenty of time after picking up the red key as it let me turn right back around.

As for the white key, here it does become mandatory! I don't begrudge it too much, as I think this is a very clever mechanic. The looping nature of the board means that you'll have to outrun your own bullet as well.

I do like this board. It's kind of garish to look at, but the idea behind it is unique.

Once the player climbs out, they're able to make the trip fine from then on. It can get a bit irritating when you realize you've ran past a transporter you needed to take and have to circle the whole board again, but it feels a lot more fair than the three islands. A lot of this hinges on that scroll telling you the order to collect the keys. I think the board would have really outstayed its welcome if I had to worry about deducing the correct order as well.

All that work for no payoff. This is the weather tower, and while the magical energy field is in place it can't be accessed.
The tower has a cool design with blinking red lights around the top and some really good use of pre-STK special colors with the barrier partially obscuring the rest of the tower that's behind it. This white-on-dark-blue coloring comes from using blue doors and changing them into something else in order to get the color combination.

Metropolis Island is the last one, and the most brutal of all.
This one is a puzzle board.

Comparatively, this board is a nicer mess to look at than the canyon as there's plenty of color variety to help differentiate between elements. Solving it can be quite the challenge.
This purple region is the first obstacle.

There's a bit of a tell that this setup should be correct just because otherwise you wouldn't need nearly as many keys are provided to get to the next section. The energizer also serves as a guide in that you'll want to take out the creatures with it while you can.

The order of course matters. Causing pushers to move early is an easy way to lock yourself out of certain areas and unable to grab keys. Then there's also that purple arrow pointing upwards. It constantly moves north and south which serves to push boulder to the north. It has to be clear in order for the player to collect their cyan key.

Finally the doors need to be opened so that this horrible garbage of boulders, sliders, and pushers just smashes into the corner and leaves the player a gap to slip into.
Once that ammo is picked up the pushers will trap the player inside, which means you're on the right track.

Here in the green section things start off a bit easier. Breakables need to be shot to keep a path forward for the player, and there aren't a lot of potential combinations for how to shoot them out.

Condensed movement continues which makes the way to go pretty straightforward. Each key collected frees up space so the only thing to really worry about is possibly blocking the path out more than trapping a key in an unreachable space.

Some basic slide untangling and before I knew it I had the path clear to the red area. I hadn't even made the connection that I'd need to turn around and travel through the green area. I was just focused on getting those columns or yellow sliders moved as they undoubtedly needed to do something.
This also frees this poor little centipede head. The last thing I needed was to take more damage so I took a more direct approach instead of leaving it be despite how content it seemed to stay in that corner and never move south where it might get in my way.


OH MY GOD

Let's hear it for games made by children everybody.
Luckily I was saving every two steps on this board already so no progress was lost. On to the rather brief red section.

Which I still promptly mess up on.

Really this one is actually that simple. Take the western transporter to get to the top right of the region, transport south to put a boulder into place. Head back around and transporter east again to put the boulder in the lower right corner and reroute the transporter to lead the player to the bomb area.

The bomb area is refreshing in that it's completely trivial. The only real danger is blocking off the column with the exit path, but with so many bombs that can be safely lit and ran away from it's pretty easy to make room to create a clear path.

Now, there might be a cleaner solution as having bombs at the end here will cause the explosions to destroy some of the gems, but that's a casualty I can absolutely deal with at this point. It also helps make it clear that the explosions take out these white walls which is the next challenge.
Just two sections remain until freedom.

The remaining gems need to be picked up and then it's just a race to push a bomb diagonally so that the path opens up. I feel like you have to get caught in the explosion here, but maybe if you're really quick and position the bomb the minimum distance to reach the walls then you can get through safely.
If none of the gems get caught in an earlier explosion, you even get a free ten health here to even things out.
Of note is that there are also two more transporters that are clearly pivotal to getting the green slider mess to do whatever it needs to do. At the same time though, I'm smart enough to not touch them until I have to.

After writing the previous sentence I moved to the next screenshot where I had pushed the sliders. So I am actually not smart enough to not touch them.

Despite being in a dead man walking situation at this point, I need to point out that I really liked the cyan slider segment. A bomb needs to make it to the bottom of the board to take out a final wall, but rather than untangling sliders, the challenge is entirely to move things vertically so that the bomb can make it down there fast enough.

With the wall bombed without touching anything else this time, it comes down to finding an order to push against the four transporters and be able to push up and over to get across.

Not only do you get the orb, but also a very helpful hint on how to access the treasury!

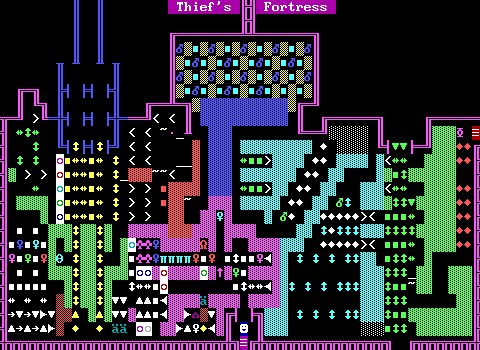
So my verdict on the Thief's Fortress?
Pretty cool.
These kind of puzzle boards are very difficult to make, and despite the annoyance of a shootable orb Janson did an admirable job striking a balance in difficulty here. Breaking boards up like this into smaller chunks makes them feel significantly more approachable. The earliest part of the fortress was probably the hardest, but all the way through the player is kept on their toes and making sure to think before they act. It's definitely the kind of board that isn't beloved by everyone, but if you're interested in ZZT puzzle boards this one really holds its own.

Heading back to the castle there is indeed a hidden switch. Nice.

Oh my god Janson you have to stop doing this.

Like the fool that I am, I figured there'd just be one hidden button, but no, the entire eastern wall of the armory is full of hidden buttons to crush all the gems and other items inside the treasury. To be fair to Janson, she did correctly label it as the third tile, and I just opted to mash everything instead.

Of course in addition to gems there are two objects in the treasury as well. The first is a pouch with more gems which rather interestingly not only gives the player 25 gems, but also the 25 health and 250 points they'd receive for picking up 25 regular ZZT gems.

The other is just a really big scroll telling you to find more scrolls.
When I crushed the treasury I immediately assumed I made the game unwinnable, but it's actually fine. (Probably not so much for the economy though.)

The last reward from the mage is 40 gems and a chance to use the crystal ball to see the future.

Visions of the future reveal that the wall near Lake Hikcha has fallen. That's convenient.

With all three treasures returned, the mage is finally over and done with.


Walls be damned though, I want to check out that cave that's been taunting me this whole time now that I have some torches.

A sign posted right by the cave's mouth reveals another set of three paths to take. Trials in groups of three is almost a theme here.

The scroll in the treasury made the importance of finding other scrolls pretty clear, but I have to know about this gold banana.

These three destinations are each one board journeys so it's not too long before I find the banana and some kind of guardian. Is it the wizard? The vortex? The spirits?
Nope. It's just "bananagaurd" [sic]. An enemy that walks and shoots towards the player and takes a few hits to defeat. You can walk right past them if you want.

Any excitement as to what on earth this banana could be for will be quickly dashed. I'm just doing things out of order here and have yet to receive a quest to prove my worth by acquiring it. Due to the way the object that gives the quest is coded, I never even saw the quest get assigned when I got there.

Ten torches really isn't a lot to travel through four boards, leading me to try and avoid lighting them in the central hub of the caves once I was confident that there weren't any enemies in there.

Well I apparently did a terrible job taking screenshots here as my images for this board are me lighting a torch upon entering it, and another at the end of the short maze.
Knowing now that there are indeed shops where torches can be bought combined with this board being full of ammo and gems it feels a lot more fair. In practice I was just wandering aimlessly through the dark and getting worried I'd be trapped in darkness if I didn't move quickly.
With some reasonable aim you can make a good profit in ammo as well here. This board exemplifies what I mean by Janson loving to keep the player ammo starved at first before just constantly handing it out to them. Or at least it does if you ignore how I could've had the key to the armory the entire time.

Unlike the large scroll in the treasury, this one is necessary to make a certain boss actually defeatable.

The maze took a number on my torches however, and I ran to the Ice Dragon's lair fully ready to cheat in more torches or just turn off the darkness entirely.


But hey, it turned out to be lit on its own.

So there are a few problems with the Ice Dragon fight.
First of all, it's breathing a stream of stars and I am going to be annihilated almost instantly.
Second, as far as multi-character bosses go in ZZT, this one doesn't look so great. I kind of see what Janson was going for here with the objects making up the mouth, but it doesn't read as a "dragon" to me. Without being specifically told that it's a dragon, I'd think of it as a weird giant skull or something.
Third, the door shuts way too quickly! I'm actually locked out of the fight here and had to reload!

Fourth, that was the ice scroll I picked up, not fire. I can't actually hurt the dragon and immediately have to reload a second time.

Back at the lake, the wall indeed crumbles once the player enters the board again, opening things up for the next portion of the game.

More castles! Four of them to break with the rule of threes this game has been abiding by.
I think I missed it in the lore book when I was playing so this board was the first time I noticed one of the castles was named Gemrule! I guess Alexis really liked that name as a future release would be The Robots of Gemrule. She must have really really liked it because the game has an alternate title of Trouble Beneath the Dome which is a fantastic name to relegate to second place.

While the The Robots of Gemrule is one of my favorites (aside from, you guessed it, keeping the player extremely ammo starved at the start), the Castle of Gemrule is another story. This is where interest in completing this game goes to die.


It starts out reasonably enough. The occupants of the castle treat the player kindly, and the king even gives the player one of the seven Prosek gems needed to complete their foolish quest.
Oh yeah we're after the seven Prosek gems now. Try to keep up.

But the princess however...

And hey! A shop! The torches are pricey, and the ammo is a bit costly as well, but 25 health for 5 gems would be an incredible deal if I hadn't been cheating for health on multiple occasions already. This came too late in my playthrough to feel worthwhile. I had a ton of gems to spend, but by this point I've already been cheating, and it's hard to bother going back to playing things legit once that line has been crossed.
Perhaps a playthrough where you start by getting the orb and immediately gain access to this area things would fare better. It's a bit of a shame that this vendor wasn't just in the starting castle grounds.

Let's be real here, the decision to rename this game to The Fool's Quest is very much a fitting one. Every instance of "fool" beyond the starting throne room has been in the game without any modification needed.

But now it's time to deal with the princess of Gemrule. She instantly calls for the guards when the player interacts with her. Perhaps the Gemrulian bloodline has been intertwined with that of King Exasperata the third.
The guards are quick to rush to her aid, blocking the player off while the princess reports their numerous crimes.
Okay, so actually the problem with Gemrule isn't the princess. The princess rules and this conversation is the best thing in this game. I love her reaction so much.
I just wish the next part wasn't the next part.

The king trusts his daughter and sends the player off to the dungeon. Missed opportunity to call them a fool rather than a knave.

HA HA HA HA
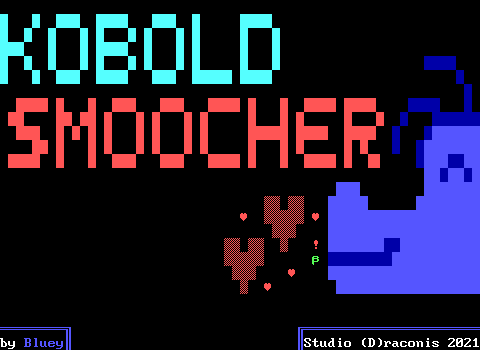
The title screen is the most significantly changed aspect of The Fool's Quest versus The Three Trials, and even then it's pretty similar. As far as Janson's worlds go, this is on the earlier side of things, and like others that we've seen in previous Closer Looks, it will be very clearly influenced by other official ZZT worlds. Bug Town was clearly Town, The Secret of Cannibal Island drew heavily from Best of ZZT Part I: The Secret of Headhunter Isle, and now The Three Trials will quickly invite comparisons with Best of ZZT Part II: Royal Treasures.