ZZT's greatest strength is its sheer simplicity. A significant portion of people who released ZZT worlds did so without any prior programming experience. The ZZT community of the late 90s and early 2000s was mostly comprised of students in middle or high school. While the majority of games released these past few years in this rebirth of ZZT have been made by folks often of that era now long past their teens, you don't need twenty years of experience to create something with ZZT.
The Museum's goal for the year is a straightforward "20 games in 2020". There's no doubt that those who have mastered the medium and been wowing us with innovative and seemingly impossibly complex worlds in recent years will continue to surprise us in 2020. However, that core of the modern community is ultimately pretty small in numbers. If you've ever wanted to make a game, I want 2020 to be the year in which that happens thanks to ZZT.
So expect a few articles that aren't about covering games of the past, but instead provide those without any experience with ZZT or programming whatsoever an opportunity to learn just how simple it can be to make something in ZZT and the joy that can come from creating a game.
That being said, the first thing I'd like to cover is a simple overview of some common beginner mistakes and issues with ZZT that might be the cause of frustration.
Saving On The Wrong Board
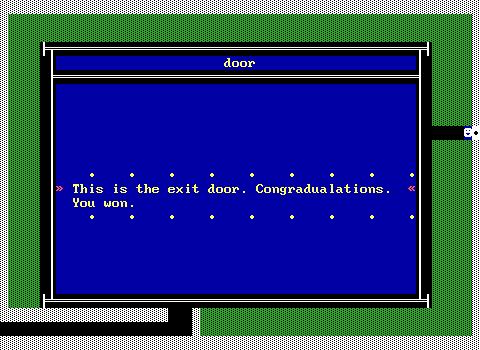
This one unfortunately plagues many published games out there. ZZT and KevEdit will always set the starting board to whatever board the file was last saved on. If you're doing any sort of testing as you develop, you'll be saving on different boards to start from there. Don't forget when the game is complete to save on the board you want your worlds to actually begin on!
Size Limits
ZZT is still an MS-DOS program and it only has access to 640k of conventional memory. There's an upper world limit because of this which is based on how much memory is available for ZZT to load the world into. Larger worlds like Fred 2 will frequently crash ZZT on loading.
With Zeta the memory limit still remains as ZZT is being used, but you don't have to worry about having MS-DOS TSR programs running in the background for mouse or sound support. You can check how much free memory is available to ZZT by typing a ? to open the cheat prompt and then typing +DEBUG. Generally, you don't need to worry about the world limit, as it takes a rather considerably sized ZZT world to really push against that limit.
For reference, a quick check of Zeta with a blank ZZT world shows more than 420 kilobytes of memory available. The old wisdom was to split your world into a second file at around 300 KB. At this point you can pretty safely go beyond such a number (400 seems to be a good standard), but if you want your world to work well on vintage hardware it's still a good number to keep in the back of your mind.
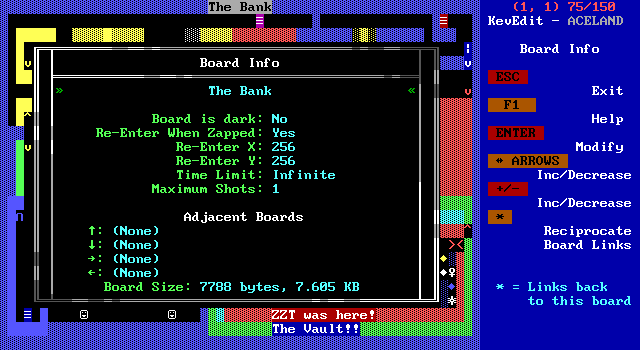
A far more easy to hit limitation is that only 20,000 bytes are allocated for a decompressed board. You can check the board size in KevEdit by opening the board information menu with "I". Still, this limit requires a board of some complexity to reach. If your game is doing basic ZZT things with a few objects to interact with then it's not really something to worry about. However when you do have to start worrying about board sizes, you'll have to start optimizing your ZZT-OOP (and possibly adjust your board layout) to shave precious bytes.
WiL's unofficial ZZT 4.1 modification helps a bit. The hack increases the maximum board size to a full 64 KB. It does not have any way to deal with the world size limitations, so beware of thinking you can get away with massive boards without any drawbacks.
Stat Limits
The last major limit is the stat limit. ZZTers have coined the term "stat" for referring to the customizable properties of ZZT elements. These include blink wall directions, lion intelligence, object code, and plenty more. If something in ZZT can be customized in ways other than color, it almost certainly has a stat. Boards only allow for 151 total stat elements and the first one on the list is always the player. In most circumstances, this limit is reasonably generous. A board consists of 1500 tiles, so 10% of the board can have these properties. A densely packed action board, complex engine with a lot of objects, or even an art board where objects are used for graphics rather than code are the most likely causes of hitting the stat limit.
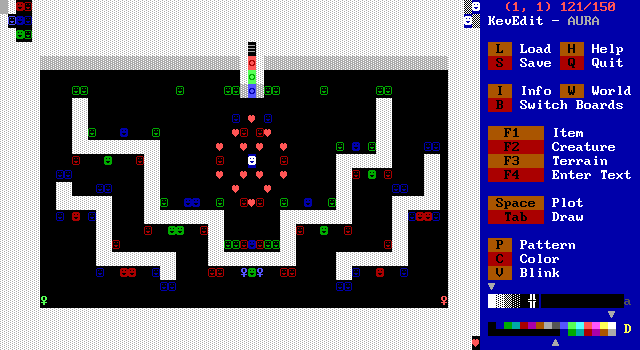
When the stat limit is hit, KevEdit won't let you place any more stat elements on the board (nor will ZZT's own editor). (Try flood filling in KevEdit via "f" an empty room with tigers and see it for yourself.) During gameplay, this means things like duplicators won't duplicate additional stat elements and objects can't place them either. The player will be unable to shoot as a bullet needs a stat to store its direction of travel, and annoyingly ZZT will still take one ammo away even if a bullet can't be spawned. Messages on the bottom row won't appear (they use a "secret" ZZT element called a messenger that uses a stat to track how long until the message should stop being displayed). There are some... quirkier effects that can theoretically be taken advantage of by having a board at the stat limit, but as of writing nobody has ever released a world that purposely exploits the stat limit. Instead, you'll want to leave a small buffer if you need messages, shooting, or duplicators to duplicate stat elements. KevEdit displays the stat count in the top right (ignoring the player, making it out of 150) so it's easy to track.
Point-blank Object Shooting
A rather easy one. The player can shoot creatures such as lions and ruffians that are standing directly next to them, but in order to shoot an object, a bullet must spawn and then hit an object. This is something to watch out for with custom enemies that need to be shot and may push the player into a corner. If the player gets surrounded, they can't fight back.
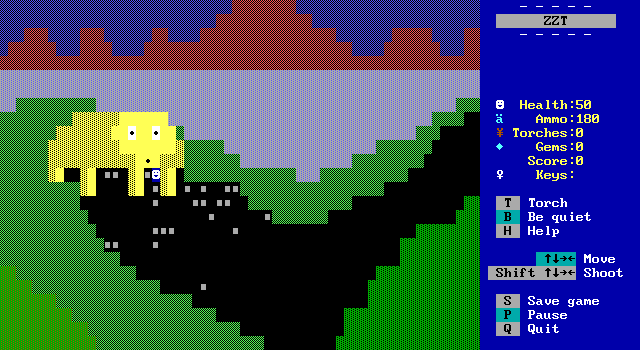
Common ways to mitigate this issue are to give the player a melee attack where enemies can also be harmed by being touched, or to make it so the object steps away from the player by having them move after their attack.
Pausing And Surrounding the player
Another easy one. ZZT lets you pause with the "P" key. ZZT lets you unpause by... moving. If the player is surrounded by tiles that can't be walked on and they pause, they'll become stuck. Luckily pressing escape to quit still works. Worse yet, when restoring a save (or starting a world) the game starts paused so it's possible to create a save that can't actually be played if you aren't paying attention when you save a game.
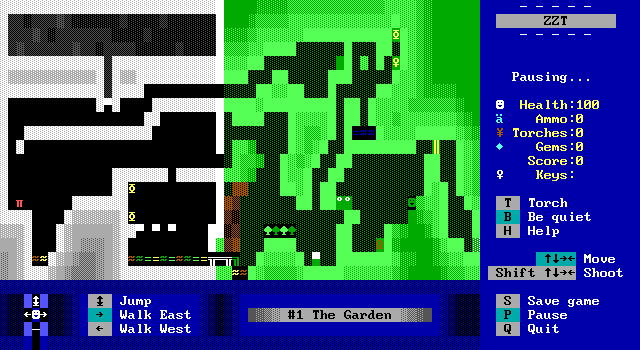
Some games use engines where during a level the player will be surrounded requiring them to only save between levels. It's important to communicate to those playing your world when they can and cannot save as there is no way to actually restrict the player from saving. A common alternative for engines is to space out the objects that would surround the player and instead have them check when they're in contact with the player, send their instructions out to other objects, and finally push the player back to the center, though this can have its own issues with introducing latency in your engine if it's not performing actions in the correct order.
The extra "l" is for extra alignment
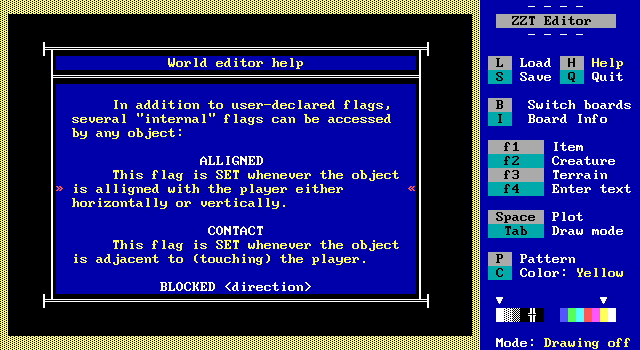
I suspect that this one is actually going to be the biggest pain for those
new to writing ZZT-OOP. The #if command can be used
by objects to check for flags being set, as well as a few special conditions such as
being blocked in a certain direction or if the player is adjacent to them.
The error here is that you can test whether or not that player is aligned with
an object with #if ALLIGNED then label. There's a second
"l"! Spelling aligned properly will result in just checking for a flag set with the
name aligned and your object will fail to execute properly.
If you're ten years old, this is likely the first time you've ever seen the word "aligned" and typing it with a second "l" will come naturally. You'll just have a hard time spelling it correctly for the rest of your life instead.
#put in the bottom row
This one is merely a known bug that never got fixed and (I hope) wouldn't break compatibility with anything if it were fixed.
ZZT runs some checks with the #put command to make sure you aren't trying to break out of the board's boundaries. A simple off-by-one error
causes ZZT to think you're trying to put something out of bounds when you try to place something on the bottom row of the board. This happens where it's an object on the row
above running #put s <thing> as well as an object that's already in the bottom row trying to #put e <thing>
Again WiL's ZZT version 4.1 (and the earlier 4.0) fix this bug if you really need it, though mandating the use of an unofficial hack solely for this issue is probably going a bit overboard.
Code runs unless told to stop
This is basically the first thing you need to learn when you start coding in ZZT-OOP. All objects start executing code as soon as possible. This is fine for things like
enemies moving around endlessly, but if you want an object to touch when it speaks, you need to make sure the code begins with #end before the
:touch label to prevent it from displaying its message as soon as the board begins to run.

Surprisingly, not understanding the #end command did not stop somebody from publishing their game.
Many #Zaps One #Restore
A very common thing to do with objects is have them change how they act based on other things. Perhaps you have a puzzle where four buttons need to pressed to open a door.
Each time you hit a switch, you'll send a message to the door to with #send door:switchpressed.
@Door
#end
:switchpressed
:switchpressed
:switchpressed
#zap switchpressed
#end
:switchpressed
The door opens!
#die
#end
Each time you zap a label with #zap, the first matching label is commented out. Having multiple copies of the same label like this with a zap at
the end is an easy way to create a counter. If the player takes too long to hit all the switches, you'll want to undo the zaps with #restore. Rather
than run one restore per zap, the #restore command restores all instances of the label.
@Door
[...]
#end
:reset
#restore switchpressed
One is enough! It won't hurt anything to execute multiple restores, but the rest will be redundant. What's more important is realizing the disparity between the two commands
for a situation where you only want to restore a certain number of zapped labels. (This generally involves having each zap of :switchpressed also
zap :reset. Then having several reset labels that run a restore and re-zap the proper number of times. Sound convoluted? It is!)
#Bind and #Zap
As long as we're talking about things to consider with the #zap command, it's also important to understand #bind
and how that command interacts with zapping (and restoring). The use-case for #bind is pretty straightforward: you want multiple copies of the same
object on a board. #bind does not take one object's code and copy it over to new objects that run the command. What it does do is adjust
the object(s) that run the command to point to the source object's code. At first glance, there doesn't seem to be any difference between the two concepts, but that goes
out the window when you start zapping. Since only one object actually has the code and all the bound objects point to it, this means that zapping a label within that code will
zap that label for every object. This has been the bane of ZZT action game developers for ages since enemies that require multiple shots to be defeated can't just bind
code. Doing so with an enemy that's intended to take two hits to be defeated means that the player can shoot one object, and then a second, and the second object will act
as if it has been shot twice. (Plus with that label zapped for every object, all the other afterwards will also act like they were shot a second time when hit the first time.)
Depending on how an object is coded, this can result in far worse issues than enemies with reduced health, as it can be possible to zap the last instance of a label and cause anything that would make the object jump to that label fail entirely.
Not #Locking Objects
This one is easy to miss as it won't always cause issues depending on how things go. The most common example are
doors that open by moving say north and then west, before they close by moving east and then south. If the object isn't
locked with the #lock command, the player can touch the object mid-animation, causing it
to jump to its :touch label and start over by moving north again. Using #lock will keep the object from jumping around its
code by external events until it is unlocked with #unlock. Of course, make sure to unlock
things after they no longer need to be locked lest your door only be able to open and close once!
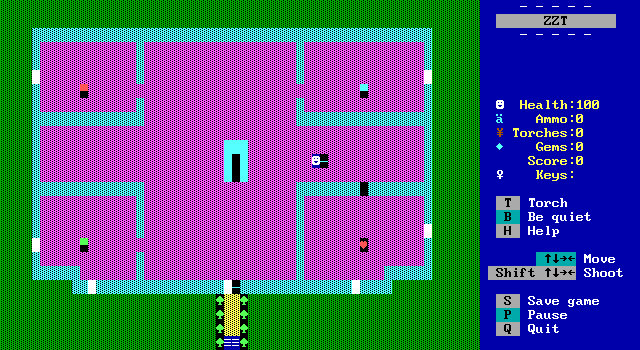
A more advanced feature of KevEdit is the ability to manually lock an object in advance. Hit enter on the object to open its stats and you'll find a "Locked" property that can be adjusted with the arrow keys. Having the object locked to begin with wouldn't be helpful with the door example, but can be useful for saving space in code.
#Become/#Change/#Put Use Default Properties
This is kind of an annoying one. The #become #change, and #put commands
create a new element during gameplay. For elements that don't have customizable stats (not colors) like walls, ammo, or
keys this works just fine. For things which are usually customized like enemies, passages, or other objects, things don't work out how you might hope. Anything
that can be customized in ZZT has default settings, and only these default settings can be used with the command, which in some cases works out okay, and in others
makes the command near-useless. Some notable examples:
#become passagemakes a passage to the default destination board... the title screen.#change cyan normal tigermakes tigers with the lowest intelligence and firing rate. If you wanted star throwing tigers, too bad.#put e transporterwill create a transporter with its direction set to idle. This means it's nothing more than a weird wall (with stats).#become green objectmay seem like an easy way to change colors, but it will turn into a default object which means the invisible char 0, cycle 3, and most importantly it will have no ZZT-OOP.
There is one small exception to this with #put and #change where if the element doesn't change, but the color does, the stats will stay. This lets you have Object A #put s purple object
over Object B, and then Object B will change its color to purple but keep its code.
ZZT and STK Colors
Back in 1994 Alexis Janson released Super Tool Kit which was a series of board with hex-edited elements to appear in colors they normally couldn't.
This made things like blue lions or dark red fake walls possible. However, ZZT is only aware of the bright colors, blue, green, cyan. red, purple, yellow, and white.
You cannot refer to STK colors in ZZT-OOP. Commands like #put seek gray solid will fail. In addition, some elements are restricted to only
being their default ZZT color, like ammo being dark cyan. Even a command like #put n red ammo will still result in dark cyan ammo.
There are some more advanced tricks to create things with special colors, which typically involve the use of a special colored empty tile and putting something without specifying a color on top of it or changing the tile into a placeholder element that uses the special color and then changing that into what you wanted in the first place.
Background Colors and Movement
Although KevEdit will let you pick background colors for any element. It's possible for elements to lose their background when they move! This comes back to stats. Elements without stats like boulders and sliders can be moved around and keep their background color just fine. Elements with stats like objects update their background color to match the background color of what they're standing on top of. Since this updating only happens when something is moved, objects and other stat elements can still have background colors provide they stand still.
A rough work around if you desperately need an object with a background color to move does exist, and it looks like this:
@Mover
#put e purple door
#put e fake
/e
:loop
#put e purple door
#put e fake
#put w empty
/e
#loop
Unsurprisingly, objects with background colors very rarely move. This trick relies on placing a color door and then a non-color specified fake wall on top of it which results in a white on dark-door-color fake wall that can then be stepped on to give the background color. The fake walls produced by this method need to be cleaned up as the object moves along.
It's kind of an odd feature for things to take on background colors in this generic manner as the only way to see this property in ZZT without using coding tricks like the above is placing sharks (or objects) on top of water.
STK Keys and Doors
With few exceptions, ZZT doesn't care what color an element is. You can use KevEdit to produce STK colors and make bombs, walls, ammo, lions, pretty much whatever you like in whatever color you like, but there are two exceptions where color indicates behavior. The first of which is with keys. ZZT only expects seven possible key colors (the default bright colors mentioned earlier). KevEdit gives access to 256 foreground/background color combinations. Luckily, ZZT handles these extra combinations almost perfectly. The background color is completely ignored bringing the 256 combinations down to a much more manageable 16. Dark colored keys act the same as the stand light ones, so a dark purple key will give the player a purple key just fine. The one issue comes from black and/or dark gray (which are technically "bright black") keys. (Light gray keys are really "dark white" and work normally.) ZZT only expects there to be seven possible colors for keys, and black keys introduce an eighth.
When a key is collected, ZZT marks a region in memory to indicate the player has a key by adding a value of 0xFF or 256. When a door is opened, this same spot is reduced by the same amount, zeroing it out. The color of the key is used to determine the exact spot in memory it belongs, and with a black key this calculation points to a spot in memory not meant for keys. The spot in memory points to is the player's gems count. Touching a black leads to a few effects.
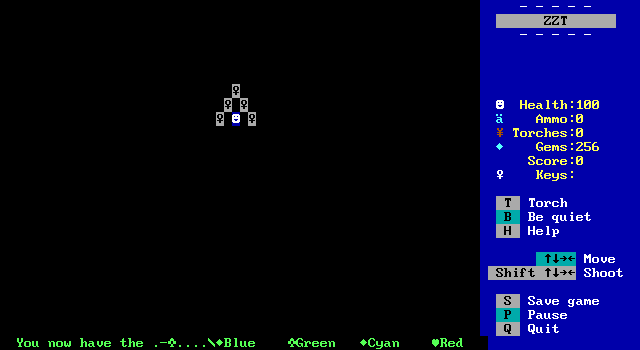
Firstly, the player gets 256 gems when they pick up a black key. Secondly, the message for displaying the color key collected is also broken. It also means that the check for if the player has a black key or not looks at the player's gems. If a player has 300 gems, they won't be able to pick up a black key. Black doors meanwhile will check the same spot in memory and take away 256 gems when touched.
The corrupt message when working with black keys/doors has led them to be pretty unpopular in actual usage. Generally they're just avoided rather than exploited.
Passage Destinations
The second instance of ZZT caring about colors comes from passages. Unlike keys, passages do care about foreground and background colors meaning KevEdit does open up a full range of 256 possible passage colors. What matters here is how ZZT determines where to place the player on the destination after they enter a passage.
The first thing ZZT does is check for any passages on the destination board that are identical in color. If there aren't any, the player is simply placed wherever that board's player is: either where they were originally placed in the editor, or wherever the player was when they last exited the destination board in gameplay. If there's a matching passage, the player is placed on top of it. Frequently this is all you need to know. If two boards are to connect via passages, just make them the same color and move along. If there are multiple passages on a board that are identical in color, ZZT will use the last one on the board scanning it left to right from the top row to the bottom. The destination isn't considered, so it's possible to spawn on top of a passage that leads to a third board even if elsewhere a passage on the second board goes back to the first.
Non-reciprocal Board Connections
Not only can boards be connected by passage, but they can also directly link to other boards by setting connections in the board information menu (opened with "I"). When the player tries to walk off an edge, ZZT will check if there's a connecting board, and if there is, it will check if there's a a free tile the player can step on on the opposite edge. (So walking east while 10 rows down will check what the destination board on its west edge 10 rows down.) The common mistake here is that these board connections are by default one-way. If you intend for the player to travel between multiple boards back-and-forth, you'll need to make a connection from the second board to the first, just as you would from the first to the second.

KevEdit offers a shortcut to do this when viewing board information by selecting the board connection and hitting "*" to automatically make a reciprocal link which will also be indicated with a "*". ZZT itself doesn't care how boards connect, allowing for non-euclidean layouts, but in practice board connections are usually pretty sensible and wanting to connect two boards both ways happens far more often than not.
Messages Unexpected Taking Multiple Lines
Finally, we have an occasional seemingly inconsistent issue with how ZZT displays messages. If the text is only a single line, it will be displayed as a flashing message along the bottom of the screen. If the text is multiple lines, a window will open up allowing the player to scroll through it.
Something like this however, will result in a window displaying the two lines of text:
@Howdy
#end
:touch
Hello!
#put e red key
Have a key!
This happens because some commands like #put don't end the object's cycle, so code continues to run and the two lines of text get seen a single block.
If the put command was instead #go e, then the first message would display and the object would move. Then on its next cycle it would display the second message.
The above example is a bit forced, as if it worked as expected the "Hello!" would almost instantly be replaced with "Have a key!" on the bottom of the screen. Where the issue more frequently occurs is with jumps between labels:
@Howdy
#end
:touch
Hello!
#if blocked e jump
The space to the right is clear!
#end
:jump
I'm currently blocked by something.
In this example you'll wind up with a text window either way, but what's interesting to note is that if the object is blocked and goes to the jump label, the message that's displayed will actually take up three lines! One for "Hello!", one that's blank, and one for the "blocked by" text.
I don't believe the exact details are fully documented anywhere, but if you find yourself getting extra blank lines or expecting a flashing message but getting a pop up window,
the solution is to add a /i next to the line of text (before or after depending on where the extra line is being introduced). This will make the object idle in place and force the end of its cycle without doing anything else like reading more text content.
But Wait! There's More!
I hope this list has been useful! ZZT-OOP still manages to offer an unmatched simplicity to power ratio, but it still contains its fair share of... interesting design choices. The good news is that most of these issues are pretty easy to avoid once you know about them. Their biggest danger comes from being caught off guard by something unintuitive and having to make modifications to a world to fix it. A lot of the fun of ZZT comes from finding creative ways to get around its limitations and sometimes exploiting bugs and turning them into gameplay mechanics.
If you're still learning the basics, KevEdit's help file contains a lot of details and lists undocumented features in ZZT-OOP. For reference and inspiration, the ZZT Encyclopedia compiled by Chronos is loaded with engines, tricks, and exploits to do more with ZZT than ever thought possible. (Version 3C linked earlier is the recommended version, the later Online release includes a little bit more content, but is arranged in a way that makes it far more difficult to find specifics.) MegaZZT and ZZT Help Kit are small object compilations ready to be copied into your own world as well as being great examples to study from. Lastly, don't hesitate to download any random world and open it up in KevEdit (or even just the file viewer) and take a look at how things like sidescrollers, RPGs, Sokoban, or inventory engines have all been implemented in ZZT throughout the years!
