
This game was selected for a Closer Look by the good folks who participated in a Worlds of ZZT Twitter poll! They were given the choice of "something old", "something new", "something borrowed", and "something blue" with no hints other than that all of the choices would lead to a different game by Zenith Nadir. It was a close poll won by "something borrowed", and so that is why we'll be checking out Fantasy World Dizzy together.
For those unfamiliar with the series (as I was when Nadir begin releasing Dizzy ZZT games), the Dizzy series is a collection of several puzzle platformers by Codemasters that was more of a success in the European computer market than in America.
The original Dizzy games are known for having difficult mechanics, as Dizzy is an egg and will roll for a bit after a jump from his momentum. He'll also break from long falls as well. Nadir's ports ditch the platforming to work better in ZZT, which winds up making these games quite possibly the only case where the fan ZZT games feel like a wiser choice than the originals. (But I'm almost certainly speaking blasphemy to anybody who grew up playing Dizzy games and rolling off things to their demise constantly.)
While other ZZT adaptations of adventure games like King's Quest ZZT or Quest For Glory ZZT were new adventures in a familiar setting, Nadir's Fantasy World Dizzy, Treasure Island Dizzy, and Magic Land Dizzy all try their best to recreate their source material in a new environment. They work rather well and are all a lot of fun to play! So let's explore this first conversion together.

You are Dizzy, an egg who wears boxing
gloves and an adventurer hat.
You and your girlfriend, Daisy, were
outside one day looking for your hat,
which you had lost.
Daisy found the hat. However, suddenly and
without warning, you were both TAKEN AWAY
BY THE FAIRIES...uh, I mean, you were both
captured by peeps who wanted eggs for
breakfast, or something. Daisy was
captured by the eeeevil wizard who lives
in the cloud castle, and you were captured
by the king and thrown into his dungeon
with an idiot troll.
You don your hat and vow to save Daisy
from a fate worse than breakfast. Finding
the security slightly lacking, you escape
the dungeon easily. Now what? THAT IS UP
TO THOU
Enjoy the game. At any time in the game,
type ?+i <enter> for the inventory engine
to show up. To use something on an object,
just stand next to it and call up the
inventory. To look at an object in your
inventory, simply select it from the
engine at any time during the game.
• • • • • • • • •
The game begins with a depiction of Dizzy, our protagonist, and a brief backstory. His girlfriend Daisy has been kidnapped and is now a damsel in distress. An evil wizard has locked her away and the king has had you thrown into the dungeon. Dizzy needs to escape the castle and find and rescue Daisy.
This is also an adventure game! It uses the trick of setting a flag via the cheat prompt to make an inventory object react to that flag and list items that can be used. These engines are always a little bit tedious since it takes so much to open the inventory, but it does give a feeling of playing an adventure title better than just touching objects and then selecting items.
One thing (which I can't pin on Nadir since it applies to almost every ?+i based game) that's always bugged me with these type of games in ZZT is how many require ?+i while also not having any shooting in the game. A much faster alternative would be to have some player clones surrounded with breakables that make the inventory open when they've been shot away. Then you could have the same mechanics but activated by simply pressing the spacebar.

The player is given control of Dizzy in the dungeon where there's a very large troll guarding the exit.

Getting right to it, I check if Dizzy has any items on him, and sure enough he has an apple.


Exploring the rest of the room, there's a skeleton chained to the wall, a cup of water, a stale loaf of bread, and a fireplace. Our first puzzle doesn't take much to figure out, but by experimenting with the inventory system the player can get a hint and make a new friend.

The troll only needs to keep Dizzy away from the door. There's nothing in their job description about keeping Dizzy away from the fireplace.


Behind the fireplace is a secret exit from the dungeons. The path leads towards a room with a few barrels, and an animated pool of water. In the center of the room is a heavy boulder which Dizzy easily pockets.

Following the path leads to a passage blocked by a rat and the next puzzle.

Limited options make for easy puzzles.


The passageway leads up to a castle lobby with a large staircase. Having proven a basic understanding of the inventory system the player is suddenly given a much larger area to explore with four new exits from this board.

On the top of the stairs is a large painting of a scene from Treasure Island Dizzy. Nadir's ports don't follow the ordering of the main series, and Treasure Island would be the next ZZT game.

To the northwest there's just a continuing path, but the player can still get a good look at the rest of the board. Nadir's artwork for the game is pleasant to look at, but being an earlier title of his, there's still a lot of room for him to grow as an artist in ZZT. Fantasy World Dizzy looks nice, and does have Nadir's expected bright and colorful environments, but everything is more basic than you'll find in his later work with Frost 1; Power or Evil Sorcerer's Party.
Most notable is the large portcullis that's shut, preventing exiting the castle. Fortunately, the lever controlling it is right up here.


The gate raises, but it soon drops back down. It winds up constantly rising and falling, turning it into a dangerous trap that Dizzy will have to quickly run through to avoid being impaled against it.
Lastly, there was that gem picked up by examining one of the torches on the wall. Fantasy World Dizzy has lots of gems scattered throughout for the player to find. (You can even see a yellow one on the path outside.) It's easy to assume they're some optional bonus, but it will eventually be revealed that they're mandatory in order to get the end credits. I'll have some words to say about this when it comes up.

Continuing up into one of the castle towers is a bedroom with a locked closet, a big bed, and this cute little ZZT mirror.


I love this effect. ZZT mirrors are the best.
Other than the gem there's nothing else in the bedroom. The closet is locked, and at no point in the future will it open. Get your gem and get going.


The dining hall has a fellow villager, Denzil, exploring the castle and listening to some music. If Dizzy speaks to them, a player clone is used to warp the player onto a cutscene for some dialog.

DIZZY: What are you doing *here*, Denzil?
DIZZY:Don't you know, it's dangerous here.
DENZIL: Hey, stay cool Diz. I saw the king
DENZIL: leave and I thought I'd check out
DENZIL: the castle.
DIZZY: Daisy and I were captured. I was
DIZZY: thrown into the dungeon, and
DIZZY: Daisy's being held in the Cloud
DIZZY: castle.
DENZIL: Oh! We'd wondered where you two
DENZIL: had got to. I'm too busy to help,
DENZIL: but here's that rope you lent me
DENZIL: last week.
• • • • • • • • •
Dizzy gets a rope after scolding Denzil for hanging out in such a dangerous place. The cutscene art features animated mouths when each character is speaking which makes it a bit more than just some character art, though the effect is pretty small.

Talking to him afterwards results in just being ignored. There doesn't appear to be anything else of interest in the dining room, but there's still one last tower to explore above it.

This castle is really weird architecturally. The board branches into three rooms. To the left:

A door that only opens when knocked on.
Up top:


And to the right:

With that, the northwest branch is explored fully, well, aside from the door Dizzy can't knock on. So it's time to head back and check out the northeastern side instead.

There appears to be a giant gator outside. I have to say that they're very well drawn for being mostly two tiles tall. The gator repeatedly bites forward as well, done by having the fangs move forwards along with the tip of the snout.

This branch is significantly shorter with just one board to explore. It has several statues of various knights with their weapons and armor, along with a treasure chest that has a gem inside.

Not really having a solution to the gator, I headed out the western castle exit, dodging the portcullis, and crossing the bridge where another gem was waiting.

Down the path is a rather large creature called Armarog. It's not very friendly either.


Perhaps I should've tried my luck with the alligator.

Okay first off, the fact that Dizzy's death spills his yolk is great.
Secondly, the Armarog creature actually does charge at you, but only after the
game over. This works out well despite multiple objects moving together in ZZT
never being fluid. Since ZZT runs at a much faster speed during a game over, the normally
disjointed movement plays out smoothly. It's a cool effect that would've been
easy to skimp out on with just an #endgame.

On the next attempt I manage to open the inventory in time.


Throwing the meat to Armarog causes them to head back to their cave to eat, allowing Dizzy to freely cross the field.

There's a second boulder for Dizzy to pick up which leads to a decent collection of items going on. One issue you run into when designing adventure games for ZZT is that you need one flag for the ?+i to work and are left with nine more to use for items. If the player has too many places they can visit before using up some inventory items it can be easy to run into a situation where there are too many flags to set another.

Attempts to take the bone back are futile.

Beyond the field is a river with a submerged bridge.

My first thought was to perhaps throw the rope over the river and use it to get across, but it had no effect. However, throwing a boulder in causes the bridge to rise. (Don't think too hard about that.)

Each boulder raises the bridge a tile, but I'm still short one. Until Dizzy can acquire the last boulder there's nothing left to do over here. The only place not yet explored is the path guarded by the alligator from earlier, so it's time to backtrack.

I am immediately eaten by the alligator.

This puzzle is easily the most difficult. It's not a challenge to solve, but the timing involved isn't obvious and is very tight.

I probably spent 10 minutes dying to this alligator before finally getting to use my inventory without being immediately killed.


The rope can be used to tie the gator's snout and let Dizzy pass them freely. The snout actually does get tied, and the gator's eyebrows point in the opposite direction, going from angry to sad.
Oh, and the last boulder is also here, but as long as I'm headed east I figure I should keep on exploring that direction.


The next screen is full of massive boulders and a red dragon. The dragon repeatedly breathes fire, which is obviously lethal to eggs.

Sadly this means immediately having to turn back and run all the way across to the bridge. In the original games this would involve some platforming, but in ZZT it just means a very long walk. Though given the difficulty of Dizzy's platforming it's hard to say which is better.


With the bridge fixed Dizzy can proceed to pick up the iron key on the other side as well as continue exploring the western path some more.

The path leads onward to an abandoned warehouse and a dock. There are two gems visible here, and a third hidden in one of the crates in the warehouse.

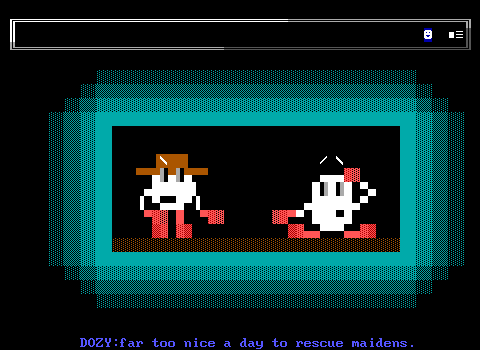
The path ends on a pier overlooking the ocean. I do like the look of this board despite how simple its design may be. There's also a new village to try and recruit in our quest to rescue Daisy


DOZY: Oh! What's the problem, Dizzy?
DIZZY: Daisy's been eggnapped and is being
DIZZY: held in the wizard's cloud castle,
DIZZY: and no-one will help me rescue her!
DOZY: Ah, that's bad luck. I'll help you.
DOZY: Here's some sleeping potion, that
DOZY: should help.
DIZZY: But I thought you just said you
DIZZY: were going to actually *help* me.
DOZY: Sorry Dizzy, I'd love to, but it's
DOZY:far too nice a day to rescue maidens.
• • • • • • • • •
It's so difficult to find good help. Still, Dizzy did get a sleeping potion out of it which could be the ticket past the red dragon.

Assuming of course, I can make it back that far.


Back at the red dragon, the potion makes quick work of them.
