

4 Easy Pieces (2x2)
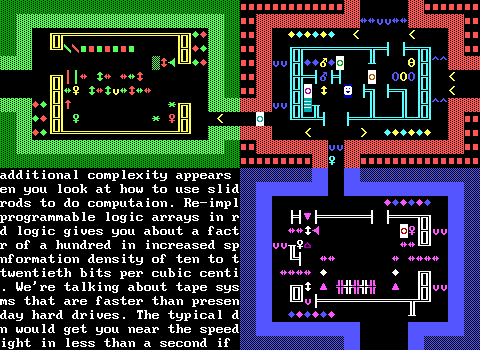
A1 A2
B1 B2
Begin in A2.
Proceed south into B2 and pick up the CYAN KEY.
Take the left path through the transporter.
Push the lower purple sliders as far as possible without moving the lower purple pusher.
Push the upper purple sliders west to the wall.
Quickly grab the energizer and WHITE KEY without getting trapped.
Proceed south and wrap to A2.
Transport south and follow the west path.
Open the CYAN DOOR.
Enter A1's "room" and collect the RED, GREEN, and YELLOW KEYS on the bottom.
Push the top-right sliderns south to let the spinning gun and ricochet shoot the breakable and ride the pusher out.
Wrap west, transport into A2 and take the northern path into the "room".
Avoid the centipede and light the bombs to clear a path to the exit.
Proceed south to B2.
Open the red door to get the PURPLE KEY.
Wrap south to A2 and proceed to the exit.
9 Easy Pieces (3x3)
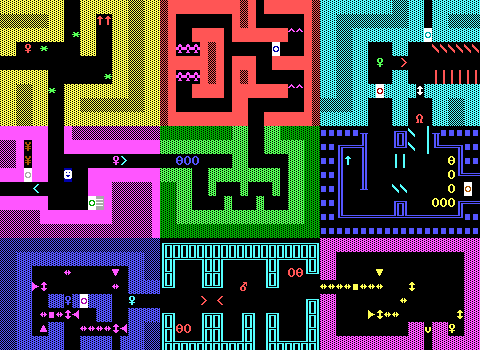
A1 A2 A3
B1 B2 B3
C1 C2 C3
Begin in B1.
Grab the PURPLE KEY.
Head north to A1 and grab the RED KEY.
Wrap north to C1 and push the slider below the key up. IMMEDIATELY MOVE BACK DOWN.
Open the PURPLE DOOR and grab the BLUE KEY.
Double back out the way you entered. Do not worry about the other key.
Return to B1 and transport east when the centipede has just started moving right.
Follow the path, open the BLUE DOOR and wrap around to C2.
Light the bomb and push it through the transporter.
Take the transporter and quickly run and grab the CYAN KEY and transport back before the bomb explodes.
You'll have to take damage.
Head east into C3, and again outrun a slider to grab the YELLOW KEY.
You'll have to push the slider next to it to the north to prevent the pusher from blocking
the exit.
Transport south to A3, and ride the conveyors to wrap to A1.
Move south to B1, take the west transporter and open the WHITE DOOR.
Continue west to B3.
Open the YELLOW DOOR.
Avoid the enemies and take the left conveyors.
Open the RED DOOR and grab the GREEN KEY.
Wrap east via conveyor again to A1
and proceed to the exit.
16 Easy Pieces (4x4)
A1 A2 A3 A4
B1 B2 B3 B4
C1 C2 C3 C4
D1 D2 D3 D4
Begin in A1.
Head east to A3.
Position the boulders to block the left side of the gun,
the bottom (which will push the key away), and the right. The top portion of the
gun can be avoiding by wrapping to D3, stepping to the rightmost tile, and then
wrapping back south to A3.
Get the WHITE KEY.
Turn around to A2 and dodge the
blink walls to enter B2.
Use the energizer to kill the lions in B3 and head to B4.
In B4, push the boulder south, then the sliders as far west as possible.
Then
push the west-most NS slider down.
Push the long row of EW sliders to the right
until the boulder aligns with the NS slider.
Push that NS slider down and grab
the BLUE KEY.
Follow the path forward and wrap around to A1.
Proceed to A3 and
wrap to C3.
Open the BLUE DOOR and collect the ammo. Try not to waste it.
Proceed back to A1 and head south to C1.
Shoot the ruffians.
Move south to D1
and grab the RED KEY.
Move back up to C1 and open the RED DOOR.
Wrap to C4.
Push the rightmost boulder up.
Take the transporter and avoid the tigers as best
as possible.
Grab the green key and push a boulder south to return to the start
of the room.
Wrap back to C1.
Due to the conveyors, take the east path and shoot
any ruffians.
Light a bomb to destroy the breakables.
Follow the path eastward
and wrap to A1.
Move to A2.
Wrap north, open the GREEN DOOR and proceed to the exit.
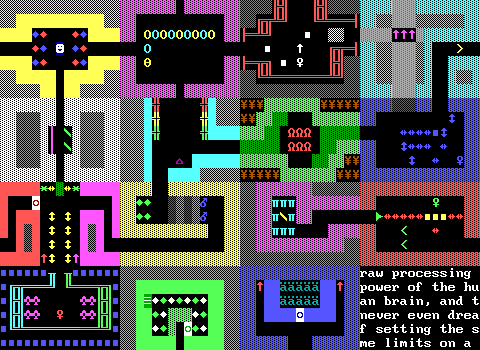
25 Easy Pieces (5x5)
A1 A2 A3 A4 A5
B1 B2 B3 B4 B5
C1 C2 C3 C4 C5
D1 D2 D3 D4 D5
E1 E2 E3 E4 E5
Begin in A1.
Wrap to A5 and head south to B5.
Take the yellow transporter to B1.
Push the rightmost NS slider up. Push the leftmost NS slider down.
Push the long horizontal all the way to the right into B3.
Shoot/Crush any tigers.
Follow the path south through the transporter into C2.
Move south into D2 and
easter into D3.
Push the key and sliders through the transporter.
Go back to D2 and follow the path south through E2, E3, and into E4.
Shoot away a breakable and light a bomb.
Leave it in place to not destroy the
gems by the exit.
It is important that the blue blink walls in E4 stay in sync.
If the first bomb desyncs it, often the second bomb can be used to resync.
While the bombs are counting down, wrap south to A4.
Grab the cyan gems and transport
to the blue half of the room. To my knowledge there is no way to get the blue gems.
Move south into B4 and collect the BLUE KEY.
Proceed back to E4 via wrapping.
Move into D4 and collect the GREEN KEY and CYAN KEY.
Move back to E3 and push the sliders to the right.
Take the newly opened southern
path and wrap to A3.
Shoot the ruffians and push the boulders to the right.
Head left to A2 and wrap to E2.
Follow the path and open the BLUE DOOR to get the
YELLOW KEY.
Turn back and follow the path southeast to C3.
Transport and head to
D3.
Transport again.
Head to E4 and run past the blinkwalls.
From E5 take the northern path, opening the GREEN DOOR and defeating any lions and
ruffians.
From C5 wrap east to the pusher puzzle.
Clear the first forest piece.
Move north once.
Quickly move north, south, and then
east. The pusher pointing up should hit the top left corner.
Move north again to
make the topmost west facing pusher move left.
Turn back and clear
the southwest forest.
From the lower left corner move up once.
Quickly move east
and south to get around the left facing pusher.
Proceed to the east exit of the maze.
Follow the path to D1 and grab the PURPLE KEY.
The spinning gun will shoot the
breakables, so save your ammo.
Entering C1's maze from the right side, head up and
dash left quickly to be able to exit safely.
Wrap around to C5 and this time head
south, open the YELLOW DOOR and wrap around to A5.
Open the CYAN DOOR to get the
RED KEY, shooting the centipede.
Use A5's other exit and follow the path, wrapping
your way to A1.
Open the PURPLE DOOR.
Get the torch, dodge/shoot the centipedes and wrap south
to A1.
Take the transporter and head southeast to B3.
Head west into B1 and north to A1.
Wrap to A5, follow the path south to C5 and west to B5.
Open the RED DOOR.
Proceed to the exit.
36 Easy Pieces (6x6)
A1 A2 A3 A4 A5 A6
B1 B2 B3 B4 B5 B6
C1 C2 C3 C4 C5 C6
D1 D2 D3 D4 D5 D6
E1 E2 E3 E4 E5 E6
F1 F2 F3 F4 F5 F6
Begin in B1.
Head east to B2 and push the top sliders right as much as possible.
Turn around
and head to A1.
Clear out all the forest in the lower row, then all the forest
in the upper row quickly to allow the room to be traversible.
Wrap to F1 and take the northern exit, shooting the lions.
Wrap to E6 and get
the supplies.
Push the left and right boulders down, and the middle boulder to a
side.
Push your way into F6 and wrap to A6.
Grab the CYAN KEY and light the bomb to hopefully take out some ruffians below.
Run backwards to E1 and open the CYAN DOOR.
Follow the path upward and grab the
GREEN KEY.
Push the sliders to block the transporters to allow an exit.
Head back
to F1 and take the purple transporter.
Take a yellow transporter into F2 and grab
the YELLOW KEY.
Take the transporter to the right again and push the green sliders
as far as possible.
Enter F3 and this time push those sliders all the way to the
west to fill the left portion of F2.
Wrap around the bottom to A3 and grab the
RED KEY.
Wrap back to F3 and use F2's transporter to return to F1.
Wrap back to A1
and head south to D1.
Wrap to D6.
Move north to C6 and west to C5.
Open the GREEN
DOOR.
Follow the northwest path, light the bombs, evade the explosions, and head
to C4 to collect the PURPLE KEY.
Head backwards into C5 and take the lower transporter.
Quickly move past the spinning guns, avoiding pushing the leftmost white
boulder.
In E4, head south to collect the ammo and wrap to A4.
Open the PURPLE DOOR
and grab the BLUE KEY.
Wrap back to F4 and take the transporters out.
Push the sliders
in D4 north and open the YELLOW DOOR.
Grab some gems (don't free the tigers) and
move north to B3.
Open the RED DOOR and head west to the starting room of B1.
Go
north to A1 and wrap to F1.
Take the purple transporter to F3 and head north.
Open
the BLUE DOOR and proceed to the exit.
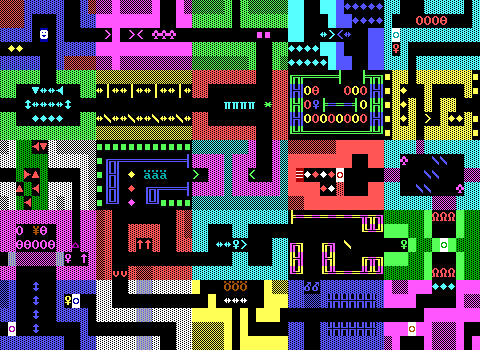
49 Easy Pieces (7x7)
A1 A2 A3 A4 A5 A6 A7
B1 B2 B3 B4 B5 B6 B7
C1 C2 C3 C4 C5 C6 C7
D1 D2 D3 D4 D5 D6 D7
E1 E2 E3 E4 E5 E6 E7
F1 F2 F3 F4 F5 F6 F7
G1 G2 G3 G4 G5 G6 G7
Begin in C2.
Move to B2, activate the Pusher to allow an exit much later on.
Proceed along the only current path to C5 and move down to D5 and west to D4.
Get the Purple Key and energizer. The spinning gun will fire stars that try to run away from you while invincible. Once it wears off you will be pushed out safely.
(Do start running up ASAP before stars get loose).
Move north through A5 via Blue Transporter.
Wrap around to G5.
Take the green transporter.
Move south to A4 and open the purple door.
Follow the transporter and head east.
The spinning gun is more dangerous than the tigers are.
Follow the path east/north and back to G4, but the other path.
Continue along and get the energizer in D4.
Manipulate stars to block the tile to the right of the transporter in D3 and take it to get to D7.
From D7 follow the path south first.
At the split, push the boulders as far out as they'll go.
Go from F7 to G7.
Wrap to A7.
Shoot the centipede.
WHILE STILL IN A7, position the player one tile above where the head was to get the bears in A6 to move as far east as they possibly can.
Then take the transporter to be placed in A6.
The next goal is to manipulate one of the bears to move south, making the A7->A6 transporter function both ways.
Transport south into B6.
Activate the upper bomb and push it north.
Step to the right and the bear in A6 should move south to achieve the previous goal.
Either use the breakables generated by the explosion to transport back north safely, or get the lions to block the empty space.
(They have a high intelligence value so this is pretty reliable.)
DO NOT TOUCH THE SECOND BOMB. It is necessary later on.
Transport back to A6 and wrap north to G6.
Push the rightmost boulder all the way to the top of the board, but do not harm or trap the centipede. It needs to stay alive and intact.
Depending on the centipede's movements, either push the left boulder south to the conveyors, or proceed north and collect the blue key.
You'll have to do both of these, but the order doesn't matter. It may be wise to not collect the ammo either.
Proceed to G6 and transport to G7's rightmost side.
Line yourself up with the top transporter and wait for the centipede to block the (upper) red transporter you just took.
Transport west from G7, which due to the centipede will take you to G4 instead.
Transporter east immediately to be placed into G5.
This time take the white transporter in F5.
Open the blue door and collect the yellow key.
Transport west after grabbing the key.
Move south along the path and take the transporter north to E1.
Follow the path southeast to G3.
Try to manipulate the ruffian into blocking the green spinning gun. Avoid the bombs as they will kill the ruffian and make the return trip more dangerous.
Wrap from G3 to A3 and collect the cyan key.
Wrap back and go through the white transporter in F1 again to leave this portion of the maze.
Wrap from F1 to F7.
Follow the path north to D7 and wrap east to D1.
On entering this board, you should have a white key from the previous one.
Use it and collect the torches and gem.
Open the cyan and yellow doors.
Move up into B1 where the pusher will block your exit.
Push the cyan sliders in B2 to the east to open a path to the start.
Transport west and wrap around to B7.
Quickly move south through the gap and
collect the red key.
On the way back, hug the right wall and the spinning gun won't fire any bullets.
Back at B1, transport north to A1 and follow the path, shooting any bears in the way.
Wrap from B2 to G2.
There's the exit, but you don't have the final key yet.
Transport west and move to G1.
Wait for the centipede to move to the rightmost space and take the transporter safely to the western edge of G1.
Wrap around to G7.
Take the transporter there to G6.
Head north D6 and open the red door to collect the final green key.
You can destroy the centipede safely now.
Head south to G6 and wrap to A6.
Transport to B6 and activate the remaining bomb.
Transport while the explosion is on screen and you'll wind up in C2, the starting location.
Proceed north this time, B2, B1, A1, A2, wrap to G2.
Open the green door.
Cry.
64 Easy Pieces (8x8)
A1 A2 A3 A4 A5 A6 A7 A8
B1 B2 B3 B4 B5 B6 B7 B8
C1 C2 C3 C4 C5 C6 C7 C8
D1 D2 D3 D4 D5 D6 D7 D8
E1 E2 E3 E4 E5 E6 E7 E8
F1 F2 F3 F4 F5 F6 F7 F8
G1 G2 G3 G4 G5 G6 G7 G8
H1 H2 H3 H4 H5 H6 H7 H8
Begin in H6.
Grab the ammo, light the bomb in G6, escape the explosion by running south and
wrapping to A6, but do not touch the slider.
When the explosion has cleared wrap back around and move north to F6.
Collect
the ammo. Shoot the centipede.
Collect the gems by heading west to E5.
Take the transporter and shove the
boulder in G5 to the far right wall where the ammo once was.
Doubleback and erase the forest in G5.
Move into the room and head east,
pushing the purple boulder in G6 to the wall as well.
Travel west and north along the path to F4.
Take the transporter and get the
WHITE KEY.
Shoot south to destroy the white breakable in H4, and get out of the way to avoid
the now much larger blink wall ray.
Carefully work your way down to H4 and wrap south using the exit on the right.
Follow the path from A4 to B4, east to D6.
You'll get a RED KEY on the way.
Open the WHITE DOOR and get the torch.
Collect the ammo and head north to A6.
Wrap around to H6.
This puts you at the
start of the level.
Follow the path northwest again to F6 and open the RED DOOR.
Take the red transporter in E6 and shoot any enemies close by.
Shoot away some specific green breakables: both in the top row, the left in the
middle row, and the left in the bottom row.
Proceed north in D4, shooting any of the enemies in your way.
Collect the ammo
but do not push the boulders.
Follow the northern path and collect the CYAN KEY in C3.
Continue west to C2, take the transporter and collect the ammo on the other side
of the cyan boulders.
Push the boulders east ONLY just far enough so that the rightmost boulder blocks
the southern exit of D4.
Push that boulder south all the way to block the red transporter in E4.
With the
breakable wall on its left, the red transporter should now point to the yellow
transporter. Take it.
In E3, take the southern path to get some gems.
Shoot the lions.
Move around the sliders.
With the blink wall on, slowly push each slider through so they appear on the end
of the red transporter.
With the blinkwall ON, take the yellow transporter. The red transporter is now
fully blocked and you'll wind up in E7.
Collect the BLUE KEY and push the slider
to free the yellow key above before transporting back out.
This time, with the blinkwall OFF, take the yellow transporter.
Head to G4, G5, and into H5 when the path is clear of bullets.
Wrap around to A5.
Quickly move south once and let the pusher transport you to A7.
Immediately step
right to avoid being shot by the spinning gun and transport ahead.
Shoot the ruffian and head to B8.
Use the boulder to block the blinkwall.
Shoot
the left bear and use the slider to destroy the other and open the way out.
Wrap to H8 and quickly head left to H7 as the spinning gun will shoot stars.
Push the slider to the right, and move yourself left to allow access to G7.
Shoot
the centipede and head into G7. DO NOT GET THOSE GEMS.
Transport right to G8 and hold up as you run into the slider.
The pusher would transport you once and you should run north into E8.
The leftmost transporter in F8 should be blocked by some combination of gems, bombs, and tigers.
Follow the path and get the YELLOW KEY.
Turn around and exit via the transporter in F8.
Light the bomb and tank the hit.
Move south into H7 and exit west to H6.
Once again follow the northwest path towards the white blinkwall in F4.
Go south
to H4, wrap to A4.
Open the YELLOW DOOR.
Turn around and head back towards the start.
In G6 head north to F6 and take the yellow transporter to F2.
Open the CYAN DOOR and shoot the tiger.
Go through G3 to push the slider and clear the path for future visits.
Take the blue transporter in H3 and head north to D2.
Open the blue door and let the pusher push you through the transporter to D8.
Take the transporter there to exit at D5.
Proceed south to H4 and take the right exit south.
Take the transporter in B5, and then
the yellow transporter in C6 to end up in C1.
Move north into B1, kill the bear and activate the bomb.
Easily avoid the blast
by wrapping around to B8.
Grab an energizer and hold right to escape the conveyors.
Hit the brakes once you wrap! The C1 transporter is an instant game over.
While invinsible run south past the guns all the way to H1 and wrap.
Push the boulder and key until they've both gone through the yellow transporter in C1.
Take the south transporter in C1 to escape.
Head south to H4 once again and wrap on the southern wall's left exit to A4.
Collect the PURPLE KEY in A3.
Wrap back to H4 and take the rightmost southern exit this time.
In A4 follow the
path to C6 and transport west again.
Wrap to C8 for another energizer and run south past the guns again.
This time follow the path to the purple door and exit.
DARKNESS
Follow the path.
Pay attention to your surroundings and put off lighting a new
torch as long as possible.
Proceed to the exit?